You have no items in your shopping cart.

MEET the Founders & Team
Mike and Joylynn Jelliff, the founders of GeekStands.com as well as musicians. They are owners and users of the products GeekStands.com sells.
Learn about us!

07
Mar
At the same time, it is not an easy task to produce a full-band sound of the piano for any of the recording enthusiasts. Unlike many other instruments, the piano offers a wide dynamic range, the signal depending which part of the keyboard is being played on it – from bass to high frequencies.
With such a wide dynamic range, using a single microphone many times causes the loss of the details that make the piano unique. Unfortunately, that is where multiple microphones come in, allowing you to aim at least one at the reaction you want.
When recording a piano it is possible to use two or more microphones positioned near the piano, these techniques make it possible to record all the sound details and create a number of layers in sound.
To be more precise, the goal in this guide is to provide the most efficient tips and tricks on how to get a recording of the instrument by applying the multiple microphone approach, along with the proper equipment selection.
This article will be useful for both those who decided to record the piano for the first time and for professional audio engineers who seek to improve the sound they’ve already got.
Choosing the Right Microphones For Piano Recording

Here is a list of some microphone types that are used for piano recording
Condenser Microphones
Condenser mics are used for piano recording because of the ability of the mics to capture sounds at high sensitivity and of broader range of frequency. They are very effective in perceiving the bright and detailed sound of the piano.
Condenser mics with a large diaphragm provide warmth and depth to the sound recording, while those microphone with small diaphragm respond swiftly to quick changes in sound level and details of sound frequency.
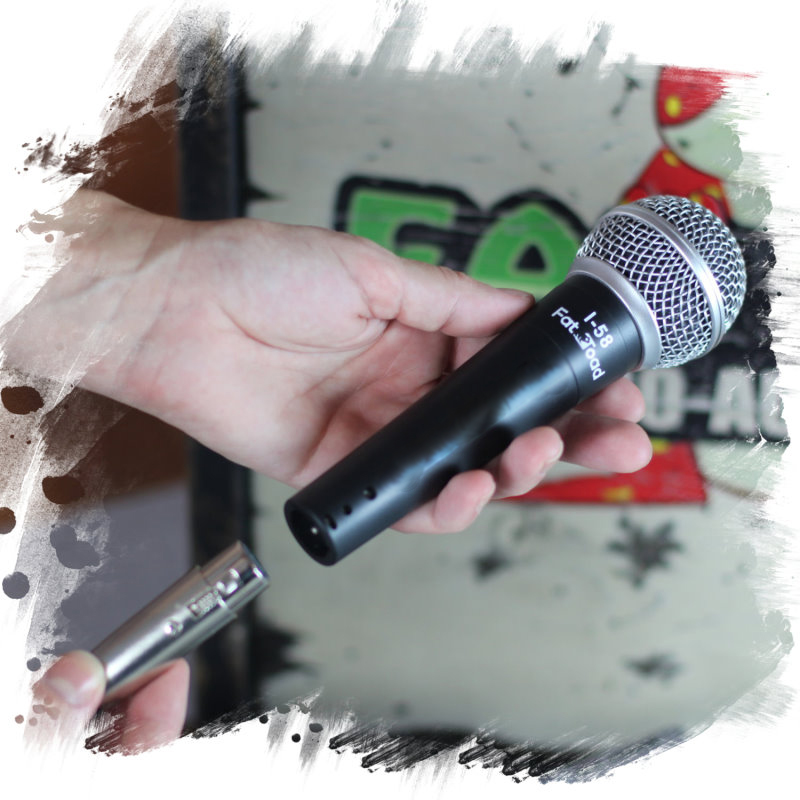
Here is a customer review from our client Roberto Kautzer
Longtime Sound man
I'm delighted with the surprisingly strong response of these mics.I generally use Shure SM58's and to be honest, to my ear they're a little different. To the public they're almost indistinguishable.A solid, well-made mic.I definitely recommend them. The price is outstanding for what you get.I'm buying more from this company.
Ribbon Microphones

The Ribbon mics offered a warm sound that fits into the midrange and bass part of the piano very well. Through their slim construction, it provides a further decay of high frequency, which produces a vintage or mellowing effect. They are vulnerable, thus appropriate use in a studio environment is crucial for avoiding damages to the set or to the equipment.
Dynamic Microphones

Thus ordinary, dynamic mics are considerably rarer in piano recording situations yet may be useful in some kinds of circumstance, particularly if the recording is live or subject to a high level of noise. They are robust and could encapsulate louder composed sound influences though they probably supplied beneficial detail and the rich sound shades of a piano if recorded within boxes.
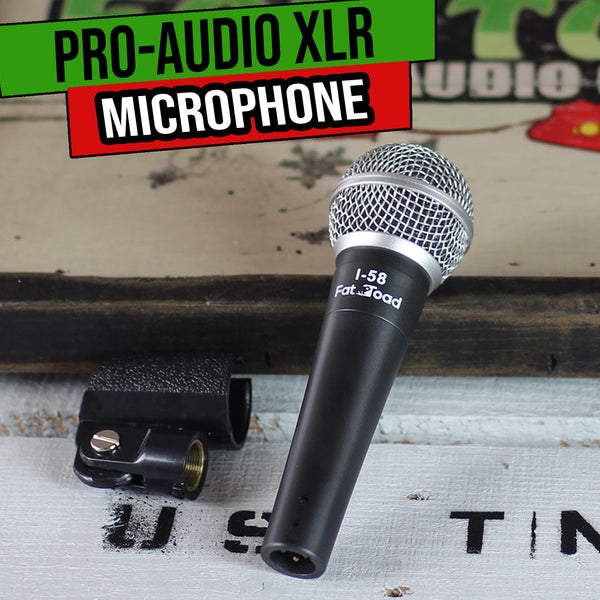
Here is a customer review from our client Samantha Schumm
Fantastic
First time writing a review. Love the microphones that came in. Great quality sounds for the right price. Came in within the week. They look really cool.
Here is a comparison table for these microphone types !
|
Microphone Type |
Sound Capture Quality | Frequency Response | Suitability for Piano | Pros | Cons |
| Condenser Microphones | High sensitivity, bright, and detailed sound | Broad frequency range, especially for high frequencies | Ideal for capturing the full tonal range of a piano, especially for more nuanced or complex recordings | Detailed, clear, and bright sound, perfect for capturing high frequencies and dynamic range | Sensitive, prone to picking up unwanted background noise, fragile |
| Ribbon Microphones | Warm, vintage sound with smooth midrange and bass | Limited high-end frequency response | Produces a mellow, soft, vintage sound, well-suited for capturing the lower/midrange tones of a piano | Warmth and depth, unique vintage sound, natural decay of high frequencies | Fragile, very sensitive to wind and physical damage, requires careful handling |
| Dynamic Microphones | Robust, rich sound with less detail | Narrower frequency range, less detail | Less common for piano recording but useful in live or noisy environments where durability is needed | Durable, affordable, and able to handle high sound pressure levels | Less detailed and less sensitive, may miss finer tonal nuances of the piano |
Setting Up the Recording Space
The means of ensuring that the ambiance required to facilitate the kinds of sound production of the piano instrument will be achieved is through arranging for the recording process. Basically it refers to aspects such as the room acoustics or the position of the curing efficiently of the recording of the piano; you will notice that even slight transformations within the space can decorate the quality of the recording.
Room Acoustics
It is astounding that the characteristic of the room where one records vastly determines the quality of sound. Recording made in rooms full of echoes or hard reflective surfaces can be produced with much bass or clutter in it. Ideally the room should equally distribute absorption and reflection. ERY: Soundproofing elements as foams, panels or diffusers are sometimes placed on the walls and ceiling in order to minimize the amount of reflections and control the acoustic environment.
Piano Positioning
The position of the piano within a room also plays an important role into how sound is produced as well. As for the recording environment, reducing the proximity of the piano to walls and corners allows to avoid reflections which confuse the recording. With grand pianos, opening the lid actually improves the natural reverb while an upright piano may be benefited by having the back uncovered to capture more resonance. It also can be helpful to simply switch up the placement for an attempt to find a match for a preferred tone.
Minimizing Noise and Distractions
Every recording has one common characteristic; the need to eliminate background noise. It is preferable to eliminate all the possible noise that might affect the result, so switch off any fans, air conditioners etc., which may be running in the room. There are lastly some tips that can be used, these include, using a partition covering the piano or using sound blankets if the noise is of major concern.
When arranging your studio, you will automatically get a better sound quality of your recording and you will have much more control over what happens to the recorded sound in the mix, so that the character of the instrument comes out clearly.
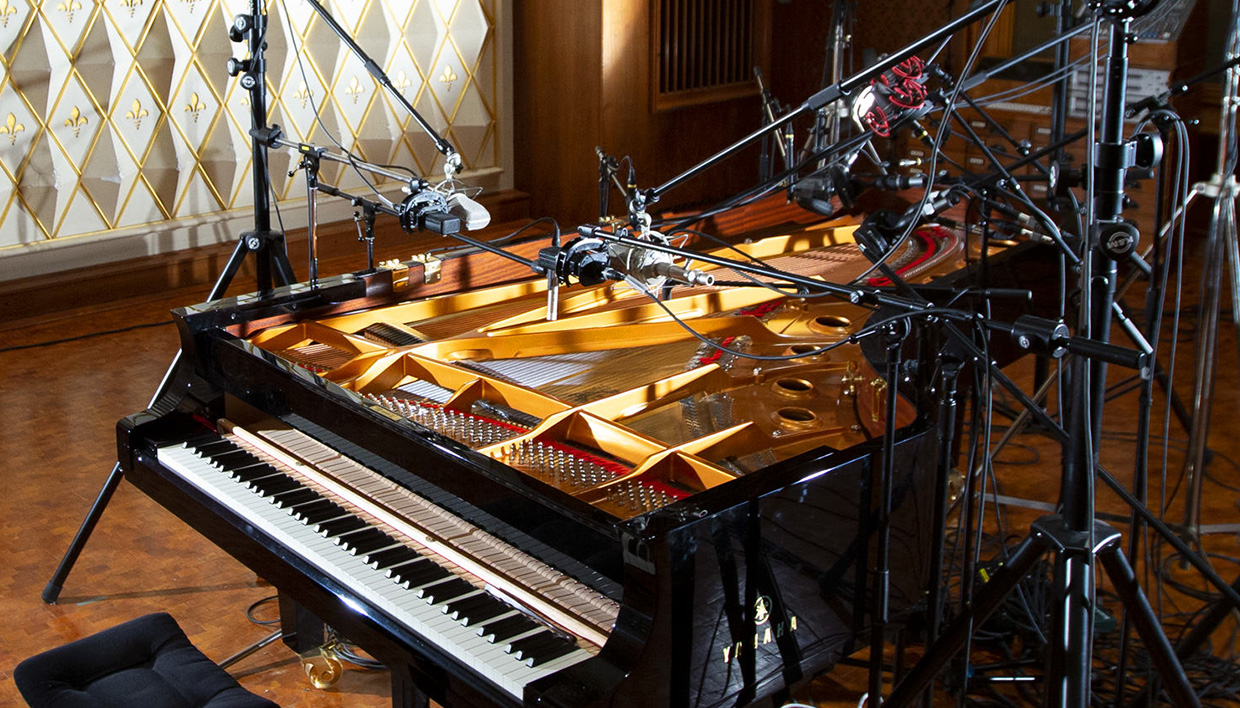
Microphone Placement Techniques
Each of these microphones’ location is extremely significant in how the sound of the piano is recorded. In most cases if you are aiming at getting that close shot or an airy recording then the position of the microphone is key.
I mean, when recording you have an opportunity to put microphones around the piano and that way you will capture many tones defining the overall sound of the piece.
Close Miking Techniques
Close miking means that microphones are placed around the piano that produce direct sound from the strings hammers. This technique not only gives a clear and clean sound, but also lets the people hear the sound of the key, hammers and the string vibration of the piano.
Near the Soundboard: If a microphone is positioned near the soundboard of the piano the bass section and the inherent ring of the piano can be highlighted. This a great setup for grand pianos especially because it shows how deep the pianos are and how full the sound is.
Near the Strings: Simply placing a mic slightly above or off to the left or right of the strings can provide very clean and clear sound in the mid and treble frequencies. This proximity minimizes the noise that may be gêtten from other rooms, compliance and accuracy are experienced.
Ambient and Room Miking
Close up miking provides a clear sound of the piano in question but, as with any instrument, ambient or room miking captures the sound of the space in which they are recorded which can greatly expand a sound’s depth and reality. The operation of this technique provides the best output in concert halls and big rooms with good acoustic features.
Placing Mics Further Away: For ambient miking of a piano, microphones should be placed about one to five feet from the instrument so that they both get the direct sound from the piano and reflected sounds from the room.
This storage method is quite suitable if you have an aim to capture the character of the room’s live sound and its depth. Room miking also makes the acoustic environment come into the sound and it will not be too close or dry.
Pairing with Close Mics: The subject has been recorded with close and ambient microphones as per the common practice in such kinds of works. Neumann warm microphones record the instrument intimacy and Sennheiser MKH8070 capture size of the hall and sources of reflections. “This hybrid method produces a greater, clearer sound than that produced by either dry mixing or spraying separately.
Stereo Setup Techniques
The techniques of stereo miking are critical when setting up for a better and integrated listening quality. These methods make it possible to get a stereo picture of the piano, which is wider and closer to the natural conditions as to the location of sounds.
Spaced Pair (A-B Setup): The spaced pair technique involves a placement of two microphones separated, usually by several feet apart from each other. These mics are directed towards various sections of the piano, to where one mic is directed towards the bass end of the piano, the other towards the treble.
The spaced pair technique records the stereo image as can be expected, however, if placed wrongly they will cause phase complications and problems. To avoid it, the microphones will have to be at a distance in between, which captures direct sound as well as the acoustics of the room.
XY Stereo (Coincident Pair): The technique requires one to position the two microphones both at a 90 degrees from the other and the capsules must be positioned as close to one another as possible. This method minimizes phase issues while at the same time widening the stereo imaging.
This type of microphone is ideal for recording a much tighter and cleaner stereo image of the piano and where stereo imaging is critical then top or hard rock, country, or pop music then it works very well.
ORTF Stereo: The ORTF technique involves positioning of two microphones at 110 degrees apart with a fixed distance of the capsules where it is usually about seventeen centimeters. This method of recording echoes the natural hearing methods where instead of pointing the microphone at the piano, it is positioned in a space and the sound from the piano is recorded.
It works perfectly well when you want to record the piano in a large room or in a concert hall and retain the environmental feel.
Blending Different Techniques
The way I figured it out is that in most multi-microphone situations, the right approach is to mix different sorts of miking. When it comes to recording a piano you can use close miking, ambient miking, and stereo techniques to get a better picture of the actual sound.
For instance you can use close mics for definition and stereo mics for ambiance and space. The ratio between these techniques depends on the genre of the music being worked on and the dialect of the recording style.
While positioning the microphones it is important to have in mind the type of music that will be played during the show. In close intimate jazz sessions covering the instruments and vocals, the use of close miking with just a hint of room sound is most favorable, in orchestral or classical where the natural room sound is desired, then the use of ambient miking alongside with distant omni stereo miles is preferable.
Common Mistakes to Avoid
Phase Issues: Another main issue associated with use of multiple microphones is the issue of comb filtering or phase cancellation which cause the sound to be thinner and almost hollow. To prevent this, then position microphones equal distance from the sound source or use phase alignment in the mix.
Overcrowding the Piano: But having too many microphones leads to an over complicated mix has been found to be true. Keep chains of mics limited so that you don’t have to deal with an immense number of cords and mutations of sounds coming from various directions.
Connecting to Interface and Preamp
This is the case when recording with multiple microphones in which proper connection for getting good sound quality must range between interface/preamp. This is how to do it and some ideas on how to end up with clean recordings.
How to Connect Multiple Mics
Choose a Multi-Input Interface: Make sure your audio interface has enough inputs for all your microphones so that you don’t have to mix and match between them. Some of the common multi input interfaces are 8 channel or 16 channel models.
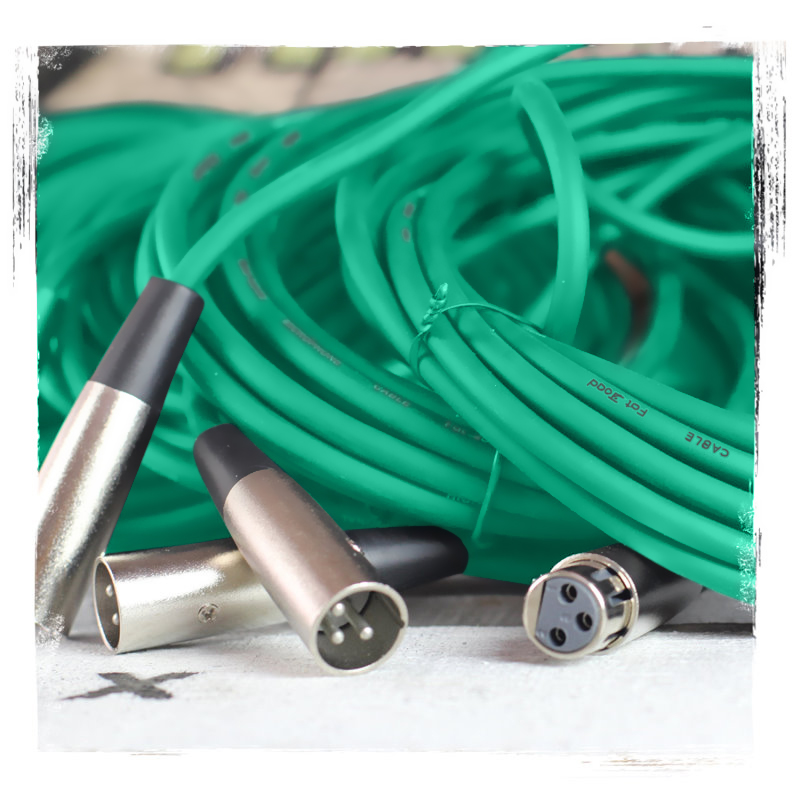
Connect Mics to Preamps: If your interface doesn’t have integrated preamps you will need an external preamp. Plug each microphone into the preamp via an XLR cabling then the output of the preamp to the interface.
Proper Cabling: You should use top-quality XLR cables for the job to ensure that there is no interference from other sounds. All cable connections should be proper and none of them should be damaged.
Set Input Gain: Bass those individual input mics to clear them up. Do not set the gain too high because it will result in distortions or clipping.
Monitor Inputs: Start doing headphones or monitor tests to make sure that each of the microphone does not have any hum nor any interference.
Recording Techniques and Tips
The most important stage that needs to be considered when using multiple microphones for recording a piano concert is the gain staging, phasing of the tracks and few more tactics. Here follows the best practices in recording.
Gain Staging
Staging is required in order to get a perfect shot and be able to record a noiseless clip. Check that all channels are correctly calibrated and height of the input gain on both preamp or interface. Use a low gain initially and slowly tighten it until you get a perfect and unclipped signal. Keep your eyes on the levels on your DAW because when they turn red, it means that they are overloading.
Phase Alignment
These are normally occasioned by phase issues, especially when more than one microphone is applied. If two microphones are set at different distances from the piano, signals of which might coincide in phase, they will interfere with each other.
To avoid this, position the microphones well, for close mics they should be an equal distance from the sound source. In using the two mics for stereo miking, always ensure you keep phase aligned by using the XY or the ORTF configuration.
Recording Tips for Clarity
Microphone Placement: Try the following arrangements in order to have the most suitable ratio of the primary source and reverberation signals. Do not put microphones close to large and glossy surfaces as those will reflect sound.
Room Considerations: Treat a room well and you will record quality results in it. Always apply the absorptive materials to reduce more reverb or reflections that may cause the sound to get lost.
Monitor While Recording: After that during recording always check the sound levels with headphones or speakers to detect and fix any problem on the spot.
Mixing Multi-Mic Tracks
Now when you’ve recorded the piano with several microphones, comes the mixing stage.
Balancing Levels
The first thing to do is to level each mic in order to ensure that they are at the same level. The leakage microphones are generally more proximal to several singers and therefore picks up direct sounds while room microphones add to the ambience.
There is a risk that when recording close mics they could mask, in this case, the room mics should not be too obtrusive and add enough sense of space to the mix. Ideally, you should balance both, and room microphones are there to help close microphones rather than to challenge them.
Panning
Panning is considered fundamental to decoding the sound field of the piano and creating the desired spatial model. For close mics, a little left and right move would create some front to back depth without compromising the center image. Room mics can especially be panned wider than the music, in order to give this natural setting and atmosphere sense.
Applying EQ
By use of EQ the general tone of the piano can be managed. Indications of low-frequency rumble that is quite apparent in room mics can be eliminated by applying a high-pass filter. You can also add more warmth to the piano by cutting the midrange slightly in the lows.
Hi cut the mids halfway in the highs. To achieve clarity in the high frequencies increase the frequencies that are high and risk making the mix sound harsh in moderation.
Reverb
Density is provided to a mix by applying reverb but should be done so sparingly. Generally, if your room mics give a good feeling of the room acoustics, reverb should not be over used. For a tighter reverb, you may also wish to add a little plate or room reverb to help keep everything clear.
Compression
Compression is used to reduce dynamic level variation of the pianos so that none of them is masked or too loud. Use minimal compression to the close mics while adopting a considerably higher degree of compression to the room mics in order to beef up their sound. Do not over-compress it because it then has a synthetic sound to the performance.
Here is a detailed youtube video about recording a piano with multiple microphones !
Why Choose GeekStands for Microphones for Piano Recording
At GeekStands, we are committed to providing our clients with microphones specifically designed for capturing the rich, detailed sound of a piano. Our microphones are crafted with precision, focusing on clarity, sensitivity, and accuracy, so your recordings truly reflect the depth and nuances of your instrument.
We offer a wide selection of microphones tailored for piano recording, whether you're recording in a studio or capturing a live performance. From condenser mics that capture the full spectrum of the piano’s sound to ribbon and dynamic mics for specific tonal qualities, our range ensures you have the right tool to achieve the perfect sound.
Each microphone is engineered to deliver natural, transparent sound while minimizing unwanted noise and distortion, giving your piano recordings the professional quality they deserve.
These qualities make GeekStands a trusted name for piano recording microphones, trusted by musicians and producers alike. If you're looking for a high-performance microphone to capture your piano’s true sound, don't wait—grab yours today and elevate your recordings to the next level!