You have no items in your shopping cart.
MEET the Founders & Team
Mike and Joylynn Jelliff, the founders of GeekStands.com as well as musicians. They are owners and users of the products GeekStands.com sells.
Learn about us!

03
Nov

Jennifer Tipton, a Tony Award-winning lighting designer once described stage lighting as “music for the eye.” She explained that this was because lighting has an effortless way of creating an atmosphere or landscape from one place to another.
This sentiment rings just as true with reference to event lighting for your DJing gig. You see, in collaboration with your music, your lighting can be a powerful storytelling tool.
You can use it to create mood, direct your audience, and deliver an unforgettable audiovisual experience. Just ask any DJ who’s had the pleasure of playing an electro-house event, from Calvin Harris to Hardwell.
But there’s just one minor caveat. Creating such an audiovisual feast for the senses isn’t exactly what you’d call easy. Of affordable.
Today must be your lucky day because we know a way around this little restriction, and if you stick around, we’ll be pulling back the curtains on how you can achieve a similar audiovisual lighting setup on your next show.
Whether you're just starting out, or a seasoned pro, join us as we explore the brilliant world of event lighting and how:
- You can achieve a dazzling DJ lighting setup on a budget
- Tips on setting up your DJ truss and lighting rig like a pro
- Where to get the best deals on professional lighting gear
Without further ado, let’s turn on the light on how you can take your stage lighting to the next level.
Step 1 - Gather the Essential Gear for a Dazzling DJ Lighting Setup

To create a spectacular light show and blow your audience away, you need the right equipment. So here’s a look into the must-have gear you need to attach your lights to your DJ truss.
1 - Lights
Other than the music, your lighting will probably have the biggest impact on creating an unforgettable performance. The right lighting will amplify the mood, improve the ambiance, highlight your stage presence, and most critically, enhance the sound experience.
But to reap the full benefits of properly implemented lighting, you need to choose the right lights for your performance, style, and venue.
The most common options for illuminating a stage are PAR cans, which provide a powerful broad wash of light while moving heads will give you dynamic and versatile lighting effects.
But if you’re looking for something a bit more dramatic, then lasers and strobe lights are the way to go. These will help you create mesmerizing displays of light and color that will enchant your audience and enhance the overall experience.
Whatever your preference, you'll need the right lights to create an immersive and unforgettable experience for your audience.
2 - Truss
To create an amazing lighting setup, you’ll need to understand the different DJ truss lighting options, and how you can use them to create an amazing show.
For example, the most common types of trusses used in DJ event lighting include the box truss, triangle truss, and ladder truss.
Let’s take a closer look at each of these options and some key elements you’ll need to know when picking out the perfect option for your setup.
-
Box truss: Sometimes also called the square truss, this is the most common type of truss used in a DJ lighting rig. A box truss typically has four sides (thus the name) and is an ideal option for hanging your lighting accessories and other equipment.
The box truss is a professional lighting staple thanks to its durability, ease of transportation, and ability to safely handle heavy weights. If you have a bunch of shows on the road, you should definitely consider adding a box truss to your stage lighting gear. -
Ladder truss: Featuring just two sides, kinda like your typical ladder, this is the simplest type of truss, primarily used for supporting smaller lighting accessories.
The ladder truss’ compact, easy-to-transport, and setup design makes it the most popular lighting rig choice for mobile DJs. -
Triangle truss: You guessed it, the triangle truss is named for its three-sided shape. It’s most commonly used at smaller events as a lightweight lighting rig that's easy to transport and supports some heavier lighting accessories.
The triangle truss can also be used as a stand-alone truss or combined with other variants, such as the box truss to create unique designs and phenomenal event lighting.
These trusses are all great additions to your performance gear. But if you live the bustling life of a mobile DJ, or an up-and-coming band always on the move, you must now be wondering what the best option for you would be.
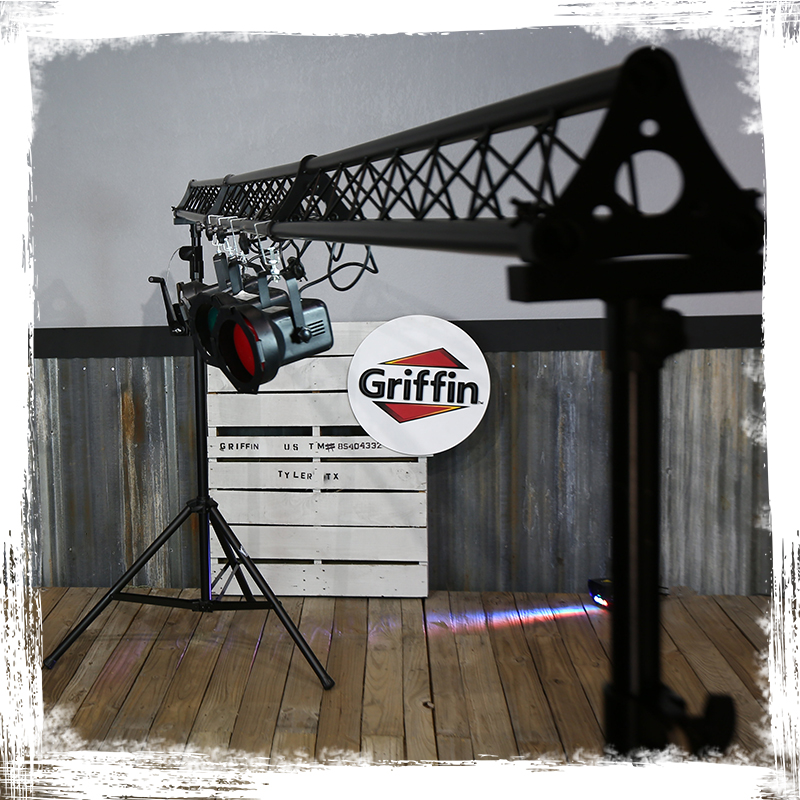
Thankfully, we’ve got an answer to that too; The Griffin Triangle Crank Up Truss Stand Lighting System.

This versatile truss system features a robust build and is designed to simplify your setup process while providing a stable mounting for your lighting accessories.
Loraine Atuhire, a tradeshow aficionado, described the Griffin Truss Stand Lighting System as incredible. She got this lighting rig to help elevate her trade show setup, and since then has seen a significant uptick in interest towards her stand.
She also described how sturdy and easy the rig is to transport in her car, and appreciates its versatility—she uses it for everything from holding up her banners and displays to setting up for photoshoots.
While Loraine’s specific use case might sound far removed from your DJ or band setup, it speaks to the quality and versatility of this truss. In her own words:
“Wow! This is an incredible product. We show up at a trade show with this rig and everyone comes up in amazement when we are setting up. It’s super sturdy, easy to travel with (by car), and so easy to set up. We use it mostly at trade shows for banner and hanging display products, but it also works for holding up a backdrop for photo shoots nicely too.”
As per your needs as a performer, you’ll be glad to learn that Griffin Truss Stand Lighting System comes with a user-friendly crank and steel cable gear system so you can effortlessly hoist heavy speakers and lighting accessories up to 114 inches.
Additionally, the triangle truss sections offer a span of up to 177 inches—ample space to mount your lighting and effects equipment. The system also includes 12 metal C-clamps that are rated to handle loads of up to 44 pounds each.
Here is a brief product demonstration video of the Griffin Triangle Crank Up Truss Stand Lighting System:
But our favorite feature of the DJ truss system is its retractable and foldable legs. This feature is, in our opinion, the most impactful when traveling between gigs. It helps ensure well-illuminated and captivating shows, no matter where your gigs take you.
3 - Clamps
Clamps are the unsung heroes of your lighting setup. Without clams, you’d be unable to securely hold your lights in place on your truss.
But not all clamps are built the same. To ensure you have the right clamps for your truss and lights, let's explore the different clamp styles and their most important features:
-
J clamp: This clamp features a J-shaped body with a long screw and a nut to secure the clamp to the light. The J clamp may be considered an entry-level clamp.
While it is a perfectly adequate truss attachment, it lacks some of the features that would make it a great option.
For example, it has a narrow profile which can dent and damage your truss. The design can also be cumbersome, making it a hassle to use. But most critically, j clamps don’t typically have a load rating, making them unsuitable for overhead use. -
C clamps: These feature a c-shaped clamp with a bolt in the bottom. They are commonly used in many trades as a truss attachment on which lights are hung.
And while they are a step above the J-clamp in terms of safety, they also have some limitations.
For instance, their bolts tend to stick out way further than on other clamps. Additionally, most C-clamps have jagged teeth, which if not properly installed, may damage your aluminum truss. -
Yoke adapters: Yoke adapters are another popular truss attachment. However, in professional lighting circles, options vary about them. This is in part thanks to their unnecessary complexity and many points of failure.
Yoke adapters also hang lower than other clamps, making it harder to connect safety cables. -
Half clamps: Sometimes also referred to as cheeseborough clamps—these are budget-friendly, easy to use, and have clear load rating markings.
They are well-regarded in the lighting industry for their safety and ease of setting up and taking down at the end of a long night. Of course, to enjoy the easy takedown, you should avoid using a wingnut wrench on the top nut when setting up. -
Trigger clamps: These are considered the best-designed clamps for event lighting. They feature oversized clamp wingnuts for toolless installation, inherent safety features, and a high weight rating ideal for a wide array of lighting accessories.
All these features come at a cost though. Trigger clamps are usually more expensive than other options.
But given their performance and efficiency, they are arguably worth every penny, which is why you should consider trigger clamps a long-term investment. -
Manfrotto super clamps: These feature an advanced, threaded, attachment solution that allows for high flexibility, within their weight rating. You can attach them securely to almost anything on stage, and they will hang on.
The only demerit super clumps may have come from their clunky design. Some people may find their chunky bodies and a large tail on the clamp screw distracting on stage.
To secure your lights to your DJ truss, you must have the right clamps for the job. From the options discussed above, it's evident that different clamps have varying strengths and weaknesses.
But still, creating the right setup, with the right clamps will make all the difference in ensuring your safety and that of your audience.
With this in mind, one product comes to mind—the 10-foot Wide - 2 Pack Triangle Truss Lighting System with Post Mount by Griffin—a complete lighting system, clamps included, by Griffin.

This system includes 10 metal C-clamps that can support up to 44 pounds each, allowing you to securely mount your light cans, mushrooms, lasers, fog machines, and other lighting accessories anywhere on the truss. Check it out on GeekStands.com to get the best deal.
4 - Safety Cables
Safety cables are an essential safety measure in the world of lights to trusses. They are a redundancy that helps ensure your well-being and that of your audience through:
- Accident prevention: In case any of your clamps come loose or fail, the safety cable will act as a backup, keeping your lights from falling, and potentially causing harm.
- Equipment protection: Event lights are expensive. Safety cables help protect your investment by preventing damage caused by accidental drops.
- Peace of mind: With safety cables in place, you can focus on delivering a killer performance without worrying about the stability of your event lighting.
5 - Power Cords
Power cords are an often underrated part of any on-stage performance. But they play a critical role in connecting your lights to a power source.
When setting up, ensure that you have enough power cords to reach the outlets or power strips you plan on using. You should also check and ensure that your power cords are in good working condition to avoid running into any issues during your set.
Most importantly, make sure to check the wattage and voltage of your lighting accessories and confirm that your power cords can handle the load. As ever, always use grounded power cords to ensure electrical safety, especially when working with high-voltage stage technology.
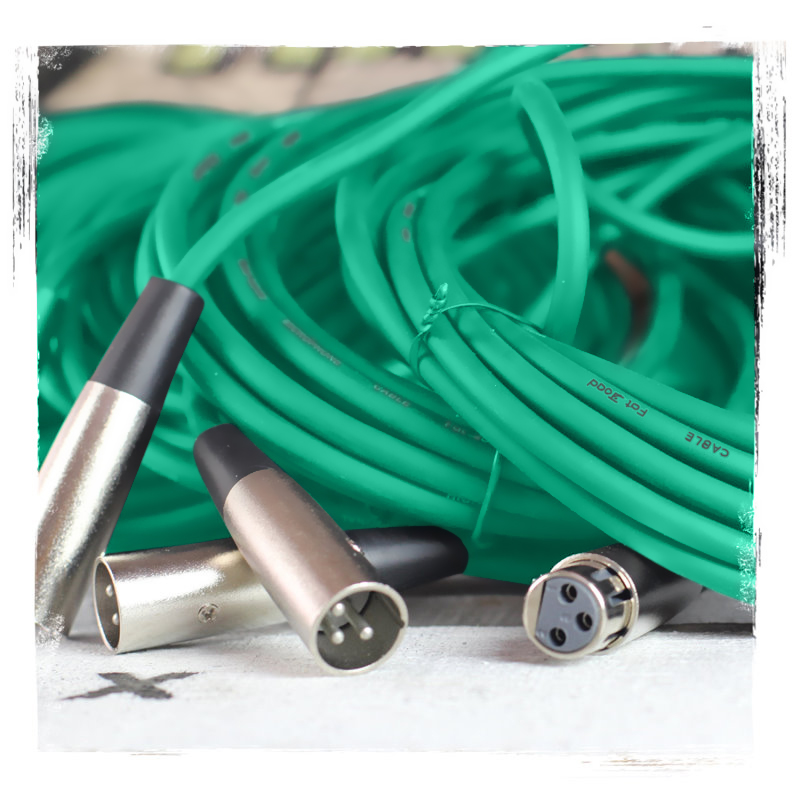
6 - DMX Cables
If you plan on controlling your lights using DMX programming, then you will need DMX cables. These cables will allow your light fixtures to communicate with your controller so you can create intricate lighting sequences that complement your music and other audiovisual content.
When choosing DMX cables, ensure that they are compatible with your lights and controller. Also, make sure that they are long enough to reach the farthest lights on your DJ truss, with a little extra left at hand in case of any issues, or setup changes.
7 - Wrenches
Wrenches are indispensable tools for setting up your DJ truss and attaching or adjusting the lights on your truss. The most common wrenches used for truss setup are adjustable wrenches, crescent wrenches, and wing nut wrenches.
To get ahead of any setbacks, you should have a few different sizes, depending on the size of your clamps and bolts. These will make your setup and take-down process far smoother.
So there you have it—the essential gear you need to ensure a dazzling DJ lighting setup. But where do you find this gear?
Well, when it comes to music tech and performance gear, there’s only one place you need to look, GeekStands.com.
With decades of experience in the industry, and the best deals and discount music gear, you’re sure to find everything you need for successful event lighting at affordable prices.
But that’s just the first step….
Step 2 - Determine the Placement of Light to Illuminate Your Stage
Just like the perfect melody, a well-planned DJ lighting setup can captivate your audience and enhance their overall experience.
But determining the ideal placement of lights on your DJ truss can feel like trying to solve a Rubik's Cube in the dark. But fear not, intrepid stage illuminator, we know exactly what you need to achieve the perfect placement.
So here are some of the factors you should consider when putting together your setup, and some tips to help you create a balanced and visually appealing lighting design.
1 - Consider the Size and Shape of Your Venue
The first, and biggest influence on your lighting decisions will be the architecture of your performance space. These will determine the best setup and dictate the direction you should take.
Here are key architectural features you should consider and how they may impact your lighting:
- Ceiling height: Low ceilings might limit your setup options, including the height of your DJ truss, while high ceilings give you more room to experiment with creative lighting.
- Room dimensions: You’ll need more focused lighting in narrow spaces, but are free to use broader coverage lighting to cover wider areas.
- Obstacles: Consider whether there are any columns, balconies, or other architectural features that could obstruct your lighting, and adjust your plan accordingly.
2 - Setup Your Lighting to Achieve Your Desired Effect
Think about the kind of atmosphere you want to create during your show, and let that inform your lighting placement. Other things that can help guide you toward achieving your desired effect include:
- Music genre: The kind of music you play should inform your lighting setup. Think of it like this, David Guetta needs a different lighting setup for a set in Ibiza compared to an intimate Adele performance at Royal Albert Hall.
- Performance style: If you're the type of DJ who loves to interact with the audience, make sure you're well-lit and visible. Your lighting will also help you set the mood and enhance your audience’s experience.
- Mood: Lighting is a powerful rousing tool. Think about the kind of mood you’re trying to achieve—be it an energetic vibe or a more laid-back, chill atmosphere, and adjust your lighting accordingly.
Here is a table that compares different lighting setups based on mood, music genre and performance style:
| Lighting Setup | Music Genre | Performance Style | Mood Setting |
| Color Wash | Pop | Interactive | Energetic |
| Moving Head Effects | Rock | Engaging | Intense |
| Gobo Projection | Electronic | Theatrical | Hypnotic |
| Spotlights | Jazz | Intimate | Relaxing |
| Strobe Lights | Hip Hop | Dynamic | Party |
| LED Strips | Classical | Sophisticated | Serene |
| Laser Lighting | R&B | Soulful | Romantic |
| UV Blacklights | Country | Authentic | Rustic |
3 - Consider the Availability of Power Sources
As much as we wish we could power event lighting with sheer enthusiasm, we're stuck relying on electrical outlets. So keep these simple power source considerations in mind when setting up your lighting rig:
- Outlet locations: Map out where power sources are around your venue, and plan out the light placement on your DJ truss accordingly.
- Extension cords: As mentioned earlier, make sure you have enough cords (and the right length) to power all your lighting accessories without creating a tangled mess, tripping hazard, or electrical malfunction.
In addition to these considerations, here are some tips to help you guide you toward a balanced and visually appealing lighting design:
- Symmetry is your friend, distribute your lighting accessories evenly across your DJ truss for a clean, harmonious look.
- Combine different lighting fixtures, including stage lighting, PAR cans, and moving heads, to add variety and depth to your lighting design.
- Don't overcrowd your truss. Leaving some space between your lights to allow for better focus and more dynamic effects.
- Angle your lights in different directions to create interesting shadows and patterns on the stage and give your set some drama.
- Use spotlights and focused beams to draw attention to specific parts of your setup, such as your turntables or the dance floor. These can also be a great way to tell a story or direct the audience during your performance.
Above all, remember that these guidelines are just that. To create the perfect setup for you, don’t be afraid to tweak and refine these ideas until you find a setup that’s exactly what you envisioned for your show.
Step 3 - Attach the Clamps to the DJ Truss
So, you've got your DJ truss setup, and you’re ready to start putting up your different lighting accessories. But before you go all in, let’s take a beat and make sure you’ve got the clamping process down pat.
After all, the last thing you want is a light fixture falling from the sky mid-performance, turning your event into an impromptu game of dodgeball.
Follow these steps to securely attach your clamps to your DJ truss:
-
Select the appropriate clamp: Your first priority is finding the perfect clamp for your truss. As we’ve covered, there are several types of light fixture clamps available.
Consider your truss type, and weight capacity when considering the most appropriate clamp for your needs. - Position the clamp on the truss: With the right clamp in hand, next you need to find the perfect placement for your truss. Among the biggest factors that should inform your truss placement are your desired lighting effect and light distribution.
- Secure your clams: The next step is ensuring that your clamps won't budge once installed. To do this, follow the manufacturer’s instructions, taking care not to damage your aluminum truss.
If need be, you can use your trusty wrench to secure your clamp around your truss.
But that's not where your setup stops. There are a few other things you can do to ensure the stability of our clamps.
Tips to Ensure Your Clamps Stay Put During Your Performance
- Regularly inspect your clamps for signs of wear, cracks, or other damage. A damaged clamp is more likely to fail under stress and send your lights tumbling down.
- Double-check that the bolts and nuts on your clamps are properly fastened. Remember, the vibrations from your musical performance can loosen bolts over time.
- Balance the weight of your lights across the truss. An unbalanced lighting rig will put unnecessary strain on your clamps and truss, increasing the risk of a catastrophic failure on stage.
- Keep an eye on the weight capacity of your truss and clamps. If you overload them, you may find yourself coming face-to-face with a light fixture in the middle of your show.
Step 4 - Attach Safety Cables to Lights and Trusses to Secure Your Performance
When it comes to setting up your DJ truss and lighting rig, one crucial component often gets overlooked—the humble safety cable.
These unassuming cables play a significant role in ensuring your lights remain securely attached to the truss, preventing them from crashing down on the unsuspecting heads below.
But you know better than to take this safety risk, so here’s a step-by-step guide to help you secure your lights and trusses like a true lighting aficionado.
1 - Choose the Right Safety Cable
Like most things, not all safety cables are created equal. To secure your lighting setup, you need the right cable for your lights and truss. Here's what to look for in an appropriate safety cable:
- Cable material: Opt for a high-quality, heavy-duty steel cable that can withstand the weight and strain of your lights.
- Cable length: The cable should be long enough to loop around the light and truss without creating excessive slack.
- Cable thickness: Thicker cables offer higher weight capacities, making them more suitable for heavier lights.
2 - Prepare Your Light and Truss
Before attaching your safety cable, ensure your light is correctly mounted on the truss with its clamp. In addition, your truss should be stable as a rock, and all your lights in their desired positions.
3 - Loop the Safety Cable Around Your Light Fixtures
With your safety cable in hand, loop one end around the light fixture's designated attachment point. This point is typically near the clamp, and it should be sturdy enough to handle the light's weight.
Secure the cable by either using a locking carabiner or threading the cable's loose end through its loop.
4 - Attach the Cable to the Truss
Next, bring the other end of the safety cable up to the truss. Find a secure spot on the truss, ideally close to the light's clamp, and loop the cable around it. Again, secure the cable with a locking carabiner or by threading the loose end through its loop.
5 - Double-Check Your Work
After attaching the safety cable, give it a gentle tug to ensure it's secure and properly fastened. Double-check that the cable isn't twisted or tangled, as this could compromise its integrity.
Step 5 - Adjust the Position of the Light

With your lights properly set up and secured, next you need to adjust and fine-tune to ensure perfect positioning. Remember, your lighting can make or break your performance. So do what you can to create the most captivating experience for your audience.
Follow these simple steps to help tweak your lights and achieve the perfect balance:
1 - Loosen the Clamp
First, locate the clamp securing the light fixture to your DJ truss. You'll want to gently loosen the clamp just enough to give your light fixture some wiggle room, but not so much that it becomes unstable. You can use a wrench if necessary, but be careful not to over-loosen the clamp.
2 - Reposition the Light
With your light free to move, you can now adjust its position. Consider the effect you want to achieve and the specific areas of the venue or stage you'd like to illuminate.
Remember, lighting can create mood, direct the audience's attention, and highlight specific areas of the stage and your performance.
As you reposition your lights, think about how they will interact with other lights in your setup to create a visually appealing and balanced design.
3 - Resecure the Clamp
When satisfied with your setup, tighten the necessary nuts and bolts to secure your lights in their new positions. Securing your lighting fixtures is essential to your safety and that of your audience and fellow performers.
Always double-check that your clamps and safety cables are secured as an added precaution. Additionally, here are further tips to help ensure you achieve the optimal lighting effect:
- Experiment with different positions to find the perfect balance between your lights
- Pay attention to shadows and how they can enhance or hinder your desired effect
- Don't be afraid to make adjustments during your performance if needed
Adjusting the position of your lights is essential to creating an immersive and engaging experience show. Indeed, lighting has the power to transform your standard DJ set into an electrifying performance that’ll leave a lasting impression.
Therefore, it only makes sense that you should invest in high-quality professional lighting and performance gear. And what better place to find such equipment than GeekStands.com?
Step 6 - Testing the Lights to Ensure a Flawless Performance
The final step of the process before curtains up is testing your light setup to ensure everything’s working correctly and safely.
But given the high wattage and voltage of your stage lighting, you’ll need to take some precautions to prevent things from going sideways during the test.
As such, here are steps you should follow when testing your lights, and some common issues you should be on the lookout for:
- Make sure your lights are connected to a suitable power source. Double-check the connections and ensure that all cables are correctly plugged in. Remember, safety first!
- Turn on the power source and watch as your lighting rig comes to life. Observe each fixture and ensure it's functioning as intended.
This is crucial to identify any potential issues that may arise during your performance, such as flickering or malfunctioning lights. - If you notice any issues with your lighting, now’s the time to troubleshoot the problem. To do this, check for loose connections, faulty cables, and improper clamp attachments.
If the problem persists, then it may be time you consider investing in some high-quality discount music gear, with a 1 year warranty, from Geek Stands. - Re-test your DJ lighting setup after addressing any issues. You want to have complete confidence in your equipment before you hit the stage. Repeat this process until all lights are functioning as intended and are securely attached to the truss.
- Finally, practice using your lighting rig to create a mesmerizing light show. Familiarize yourself with the controls and experiment with different colors, patterns, and transitions.
This practice will help confirm that all systems are a go and help fine-tune your skills for a captivating performance.
Testing your lights is the final step to delivering a stunning performance. It helps eliminate any issues and doubts and boosts your confidence so you can deliver an unforgettable performance.
Remember, the key to a jaw-dropping performance lies in finding the perfect combination of music tech and stage technology. Testing makes sure that both these variables and reworking like clockwork and helps ensure your performance runs without a hitch.
Why This Matters: A well-organized setup not only enhances safety but also makes troubleshooting and maintenance easier.
Bright Ideas: Safety Tips for Securing Your DJ Lights
Setting up your lighting rig can be an electrifying experience, but it's essential to prioritize safety during the process. You see, depending on the lighting accessories you have on your rig, the process can potentially be hazardous if safety protocols aren’t observed.
To protect yourself and those around you on stage, here are some useful tips to help you safely handle your lighting gear and prevent accidents during setup and use:
-
Always inspect your equipment: Before you begin the setup process, give your truss lighting equipment a thorough once-over. Check for any damage, wear, or lose parts, especially on the clamps, truss, and safety cables.
Catching any issues early will prevent accidents and potentially save you from an awkward conversation, or worse, a visit to the emergency room. -
Don't overload your truss: When designing your DJ lighting setup, be mindful of the stipulated maximum weight capacity of your truss system.
Overloading your truss may lead to catastrophic failures, so double-check your equipment's specifications and ensure you're within safe limits. -
Use the buddy system: Collaborate with your friends or bandmates during setup for safety and efficiency. For example, you could divide responsibilities so one person installs the lights on the truss, while another lifts them.
This dual-inspection approach catches overlooked mistakes, reducing potential hazards during your show, and ensuring safety, even if someone's off their game. -
Keep an eye on your cables: To avoid tripping hazards, make sure all cables are neatly organized and secured away from foot traffic.
Use cable ties or gaffer tape to keep them tidy and out of people’s way.
Expert Tip: Consider using cable protectors to cover and secure your cables, providing an additional layer of safety and preventing accidental disconnections.
Here's a video showing how to properly mount your lighting to an upright truss kit:
Additionally, you can follow these essential safety tips:
- Always wear gloves to protect your hands from sharp edges and pinch points
- Keep the area around your setup clear of obstacles and bystanders
- Turn off the power and unplug your light before making any adjustments
- Use a sturdy ladder or lift when working at a height
Keeping to these safety guidelines will allow you to focus on dazzling your audience with your stage lighting while minimizing the risk of accidents.
As always, the show must go on, but only when it's safe to do so!
Dazzle Your Audience With Professional Lighting From Geek Stands

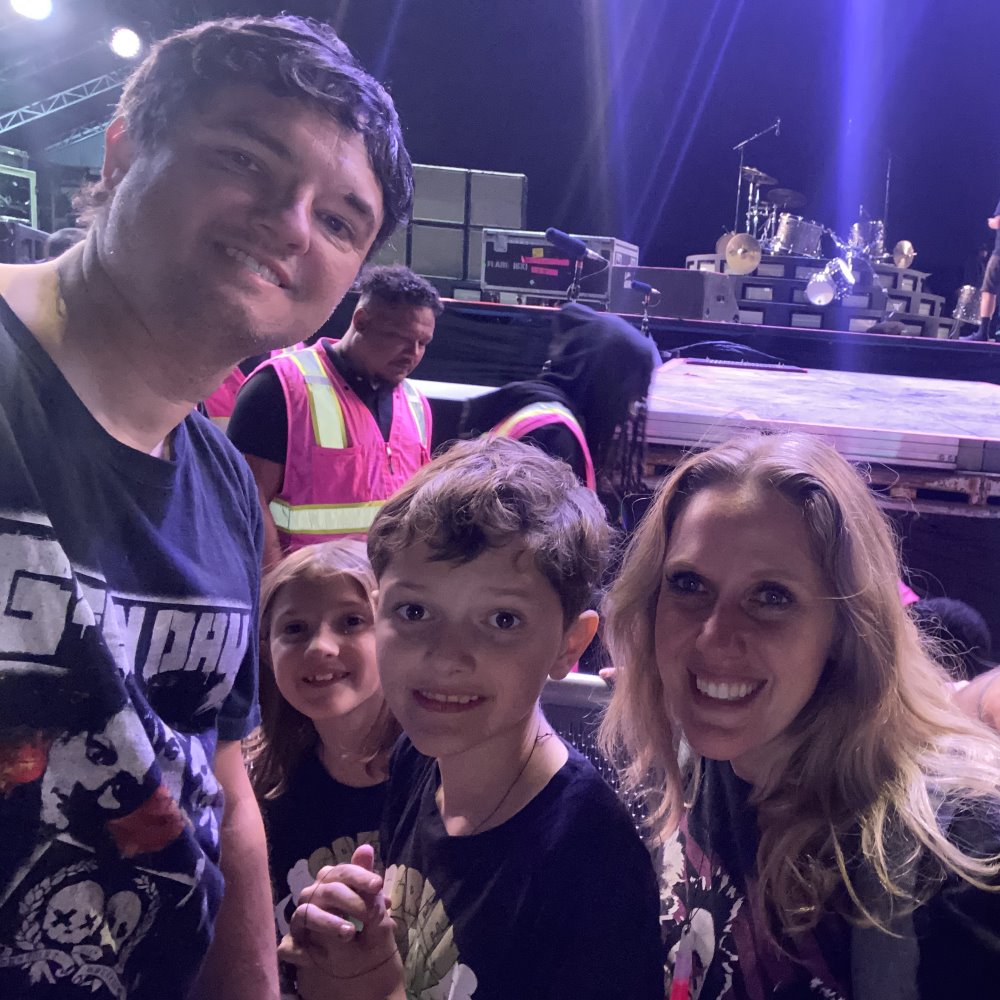
Image from an anonymous customer of Geek Stands
Lately, in the DJing world, more is more. That is; more lights, more glitz, more glamor.
But as an up-and-coming DJ, moving from gig to gig or trying to catch your big break this glitz and glamor can feel a little elusive. But no more.
At GeekStands.com, we’ve cracked the code, so listen up.
We’ve put together a collection of high-quality, discount music gear, including professional lighting equipment to help give you a leg up and get closer to your big break.
You see, at Geek Stands we’ve long believed in providing the best quality music equipment at the most affordable rates. That’s kinda how our business was born.
So we’ve combined our decades of experience in the industry and sourced equipment straight from some of the best manufacturers to create a wide selection of lighting accessories to help create your professional-grade lighting rig.
And don’t worry if you need some help figuring out what lighting accessories will be best for you. Great customer service is another thing we pride ourselves on at GeekStands.com. Just send in your query and we’ll be happy to help.
“I highly recommend this product. It is so versatile that every photographer, videographer or trade show display people should be using them. They are lightweight and easy to operate. One person can set the whole thing up in minutes. Very professional company to work with.” Guystefan on the Light Truss Stand System by GRIFFIN
But if you’re ready to start building your lighting rig and dazzle your audience with a mindblowing audiovisual show, check out our online store to place your order today.
Learn More: Why do we recommend trussing? Our previous article compares its benefits to two other stand options for DJ lights.