You have no items in your shopping cart.

MEET the Founders & Team
Mike and Joylynn Jelliff, the founders of GeekStands.com as well as musicians. They are owners and users of the products GeekStands.com sells.
Learn about us!

05
Feb

Image from Reddit
Have you ever wondered how legends like Sheila E. manage to create that pristine, pitch-perfect drum sound every time they hit the recording studio?
Are you looking to dial in your drum kit for a sound that makes the angels, or head-banging rock fans, weep?
Well, drumroll, please... because we have just the ticket for you.
In the grand symphony of studio recording, your drum kit is the brash, lively percussion section, waving its sticks frantically for attention. But to capture its voice with all the richness, depth, and nuance it deserves... now, that's a whole different beat.
That’s why we discuss:
- Exploring microphone choices
- Tips on strategic mic positioning
- Optimal drum kit layout
- The art of dampening
- Select discount music gear from GeekStands.com
Presenting... seven explosive tips to help you set up your percussion drum kit for studio recording like a drumming icon.
1 - Soundscaping 101: Picking the Right Microphones

When it comes to achieving a great recorded drum sound, the right recording drum accessories are essential. Let’s explore some microphone options:
-
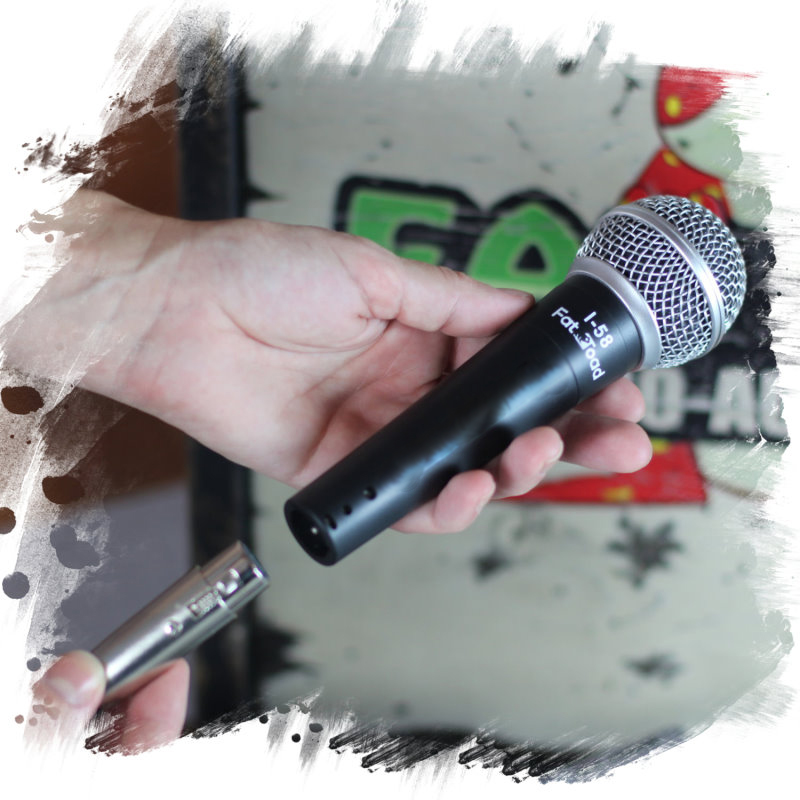
Dynamic microphones: Dynamic mics like the Cardioid Dynamic Microphones & Clips (6 Pack) by FAT TOAD - Professional Vocal Handheld, Unidirectional Mic - Singing Microphone Designed for DJ Stage, are resilient and reliable.
They're perfect for snare and toms, and if your room's a bit on the smaller side, these microphones can avoid picking up too much echo or ambient noise.
-
Condenser microphones: They're sensitive, great at capturing detail, and can add sparkle to the sound of cymbals and overheads. In a larger room with good acoustics, the detail they provide is just sublime.
- Ribbon microphones: These mics can give you a velvety smooth sound, which works wonders in a room with balanced acoustics to prevent harsh reflections.
With the right equipment and preparation, your studio recording experience can be a success.
2 - Mastering the Art of Drum Head Selection
Let's be clear: drum heads are like pizza toppings.
Some people like it hot with jalapenos and others may fancy a pineapple fiesta. There's no one-size-fits-all answer, but every choice will totally shape the flavor, or in this case, the sound, of your masterpiece.
Kick drums, snare drums, tom toms—each requires a different drum head for that perfect harmony.
Let's start with the big guy, your kick drum. Want that thump to echo through the listener's chest? Something like a clear or coated double-ply drum head will do.
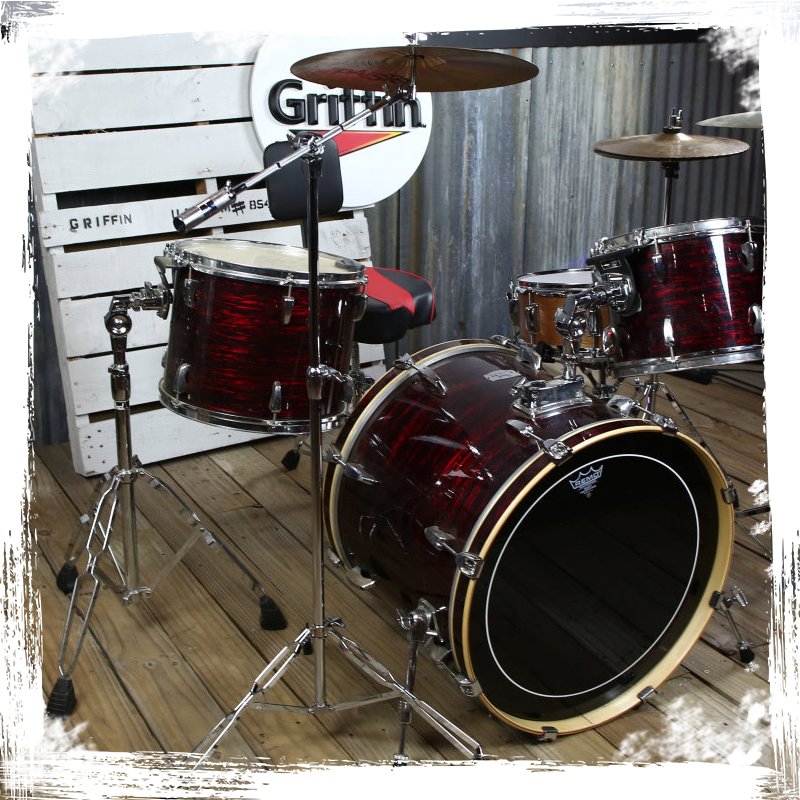
Want an even smoother session and punchier sound? Get the Single Kick Bass Drum Pedal by GRIFFIN - Deluxe Double Chain Foot Percussion Hardware for Intense Play - 4-Sided Beater & Adjustable Power Cam System.
Now, let's move on to the snare drum. Single-ply heads are often the go-to for snares, offering a lively, bright sound. But if you want more durability and a darker tone, don't shy away from a double-ply head.
And then we have the tom toms. Clear heads will give your toms a bright, open sound, while coated heads will provide a warmer, more mellow tone.
The table below compares the tonal qualities and durability of different drum head types:
| Drum Head Type | Durability | Brightness | Warmth |
| Clear | Low | High | Low |
| Coated | High | Low | High |
| Single-Ply | Low | High | Low |
| Double-Ply | High | Low | High |
3 - Positioning Your Drum Kit Optimally in the Room

Image from Reddit
Every room is an undiscovered island, with unique sonic characteristics hidden within its dimensions.
Shift around the room, and find that sweet spot where your drums bellow out with the bravado of a pirate king.
Try to keep your drum set away from walls or corners where sound can bounce back and cause interference. If possible, keep your kit at a central location in the room. This can help reduce echo and standing waves.
Let’s examine which drums you can include in your kit and where to position them:
Mastering the Setup of Your Kick Drums
The size of your kick drum plays a key role in determining the sound of your rhythmic voyage.
Larger kick drums, say around 22 to 24 inches, will give you a deep, low-end resonance while smaller kick drums (around 18 to 20 inches) will produce a brighter, punchier sound.
Once you've chosen your kick drum, position it facing straight out towards the room. Angle it slightly away from you to allow for better pedal access.
Snap, Crack, and Pop: Perfecting Your Snare Drum Setup
As captain, you'll need to choose the voice that will command your ship's rhythm.
Picking the right snare drum is as crucial as choosing the right parrot to perch on your shoulder. Different birds squawk in different tones, and different snares, well, they “squawk” differently too.
Smaller snare drums (think 13 inches or less) like the Piccolo Snare Drum 13" x 3.5" by GRIFFIN - 100% Poplar Shell Zebra Wood Finish & Coated Drum Head, tend to produce higher, tighter sounds.
This sound can be perfect for fast-paced music genres where a quick, crisp response is needed.
Larger snares (14 inches and up) deliver a broader, lower sound with more resonance. An example is the GRIFFIN Snare Drum - Poplar Wood Shell 14" x 5.5" with Black PVC & Coated Head - Acoustic Marching Percussion Musical Instrument Set with Drummers Key.
“I absolutely love this snare! It definitely gets five stars. It doesn’t weigh a lot so it's not too uncomfortable to march with. And the company was so user friendly that they even wrote a personalized thank you letter saying if anything was wrong to personally contact them.”
— Jeanie Boyer, Verified Buyer
Large snare drums are a versatile choice for many music styles, from rock to jazz.
For your home studio recording, though, you might want to choose a snare that sings out with a bright, attacking voice, providing clarity and presence in your recordings.
Position the snare on a stand, between your legs, angled towards you. The top needs to be approximately parallel to the ground, at a height where your stick strikes the drum's center when your arm is in a relaxed state.
Bonus Tip: How do you incorporate your needs when deciding on a snare drum? This article helps you pick the right snare drum for your style.
Positioning Toms: Ensuring a Dominant Side Advantage
Rack toms are typically smaller and can be mounted directly onto your kick drum or on separate drum mounting hardware. They generally produce higher pitches.
Floor toms, on the other hand, are larger and stand on their own. They belt out deep, resonant tones, like the hearty bellow of a seasoned boatswain.
Positioned to your dominant side (right for righties, left for southpaws), they're always ready to punctuate your beats with a robust, low-end punch.
Angle your toms towards you so you can easily strike them without shifting your posture drastically. For the best tone, your sticks need to strike near the center of the toms.
Learn More: Other than using a sturdy and lightweight snare stand, here are two more tips for mounting your tom drum.
Building Your Cymbal Crew: Choosing and Positioning Wisely
The type of cymbal you choose will have a titanic impact on your recorded sound.
The glimmering ring of a ride cymbal, the crashing crescendo of a crash cymbal, or the rhythmic chime of hi-hats; all these contribute distinct voices to your percussive symphony.
Once you've chosen your cymbal crew, remember to position them wisely.
They need to be comfortably accessible but not so low that they risk clashing with your other crew members.
Adjust their height so your sticks can comfortably reach them without colliding with the toms.
Using a Boom stand like the GRIFFIN Cymbal Boom Stand - Double Braced Drum Percussion Gear Hardware Set - Adjustable Height can give you more versatility.
“Well I had seen the sound rental company had about three of these in use when I was performing at a radio station festival. They performed so well I had to get one of these for my drum set. This is a very sturdy stand, well constructed, and easily holds my Paiste 18'' Ride Cymbal. I will definitely be purchasing another.”
— Prerna Ramkissoon, Verified Buyer
4 - Sound Optimization: Tuning Your Drum Kit for Best Performance
Your drums need a little TLC—tuning—to give their best performance.
Start with your snare drum, the heart of your drum kit.
Loosen all the tension rods and then gradually tighten each one, following a crisscross pattern across the head.
Make sure each rod has the same tension, gently tapping the head near each rod with a drumstick while listening for uniform pitch.
Next, let's show some love to the toms. Repeat the process used for the snare.
For a classic rock sound, tune the top heads (batter heads) a little lower than the bottom heads (resonant heads). For jazz, it's often the other way around.
Again, there's no one-size-fits-all approach here. Experiment with different tensions to find your sound.
Now, onto the kick drum. Adjust the batter head until the rods are finger-tight, then lightly tap it to confirm the pitch is uniform.
Again, trust your ears and adjust until you achieve the sound you want.
5 - Utilizing Appropriate Microphone Techniques

Your drum kit isn't just one instrument. It's a full-on orchestra of percussive power.
Each component has its own voice and personality, and they all deserve their moment in the spotlight. You’ll require appropriate drum microphone placement techniques.
First things first, let's talk about that kick drum. It needs a mic that can handle low frequencies.
Something like a dynamic microphone, placed just inside the hole in the front drum head, can capture that deep, punchy sound while a second mic outside the resonant head can capture those thunderous low frequencies.
Next up, the snare. A dynamic microphone can capture that bright, biting crack of the snare.
Position it a couple of inches above the rim, pointing at the center of the drum. You can also include an optional mic beneath to pick up the sizzle of the snare wires.
Then we've got the tom toms. Depending on your studio recording drum kit setup, you can use clip-on mics or stand-mounted mics for these.
Angle the mic towards the center of the drum to capture the meat of the sound while reducing the bleed from other drums.
Don't forget about your overhead mics, too.
Positioned a couple of feet above your kit, the Dynamic Vocal Microphones with Clips (2 Pack) FAT TOAD - Cardioid Handheld, Unidirectional Mic - Singing Wired Microphone for Music Stage Instrument provide a balanced perspective of the entire kit.
One last piece of advice: Adjust and experiment with your mic positioning and techniques until you find what works best for your unique sound.
Expert Tip: You want your microphone to last as long as your other studio equipment. This guide goes into more detail on how to take care of your microphone.
6 - Mastering Modulation: When and How to Dampen Drums
Dampening drums is a technique used to control and reduce overtones, sustain, and resonance, resulting in a tighter, more focused sound.
This can be especially helpful in studio recording to prevent excess noise or ringing.
Here's a quick guide:
- Bass/Kick drum: Consider using a pillow or a specific bass drum dampener inside the drum shell.
- Snare drum: If your snare is ringing too much, try a piece of moon gel or duct tape at the edge of the top drum head.
- Tom toms: Use a piece of moon gel or tape to control overtones and excess ring.
Remember, the goal isn't to eliminate all resonance, but to control it. It's about striking a balance, and that takes experimentation.
7 - Properly Isolating Each Drum Component
Isolating each drum component during recording is key to obtaining a clean, controlled studio drum kit sound. Here are some techniques you can use:
- Baffles: These sound-absorbing panels can be used to reduce bleed, ensuring each drum's sound is captured as separately as possible.
- Microphone techniques: Positioning microphones at correct angles and distances can minimize the spill-over sound from nearby drums. Close-miking each drum is a common technique.
- Tuning: Ensuring each drum is tuned correctly can help reduce sympathetic vibrations from other drums, leading to cleaner isolation.
- Separate track recording: If isolation proves challenging, consider recording each drum component separately.
Unleashing Your Percussive Powerhouse: Ready, Set, Rock

Image from Reddit
And there you have it. Seven golden nuggets of wisdom to help you make some serious noise in the studio, all while keeping your Geek Stands percussion gear sounding like a dream.
Remember, it's all about the details when it comes to setting up your percussion instruments.
We've learned that optimal drum miking tips are the secret to capturing the perfect drum sound. Not too close, not too far, just right.
Then we discussed the importance of positioning your drum kit so everyone can comfortably reach each other, without any mid-performance collisions and dampening techniques to get rid of unwanted sound overtones.
With these tips under your belt, you're not just prepared, you're armed and dangerous—ready to take the studio by storm and create percussive perfection.
Require more inspiration? Here is how to set up your home drum studio: