
You have no items in your shopping cart.

MEET the Founders & Team
Mike and Joylynn Jelliff, the founders of GeekStands.com as well as musicians. They are owners and users of the products GeekStands.com sells.
Learn about us!

07
Aug

A broken PA speaker cable will disrupt your audio setup and compromise sound quality during a performance or recording session. Rather than just replacing it, one can repair the cable to their satisfaction. DIY cable repairs are more straightforward than people expect them to be, with minimal tools and techniques involved.
This very comprehensive tutorial covers every detail of a damaged PA speaker cable that you might have been aware of in terms of getting fixed, including everything from clearly identifying the particular issue on hand to making exact, effective repairs.
Some damage may unfortunately prove to be irreparable, and well beyond your repairing scope, but most problems can be solved with merely a little dedicated effort from you in the long run, and this will save you some precious time and money spent during the process. The foundation of success in cable repair is to know when to repair and when to replace, what tools to use, and how to apply them correctly.
Let's dive into the details of PA speaker cables, and common damage causes, and give you a step-by-step, in-depth guide on how to repair your cable to get it working again and ensure that you have clear, uninterrupted audio every time you use it.
Understanding PA Speaker Cables

PA speaker cables are one of the most important parts of any sound system. They transmit audio signals from amplifiers to speakers. The cables are made to handle high power levels and ensure signal fidelity without distortion.
Structure of PA Speaker Cables
Typically, PA speaker cables consist of the different crucial parts that are given below:
It is the main part of the cable, which has a bunch of copper or aluminum wires bundled together. Copper is better suited for making electric current pass through with the least signal loss over longer distances.
Surrounding the core is an insulating layer made of durable materials, often PVC or rubber, to protect the core from damage caused by moisture and external interference, maintaining the resulting signal quality.
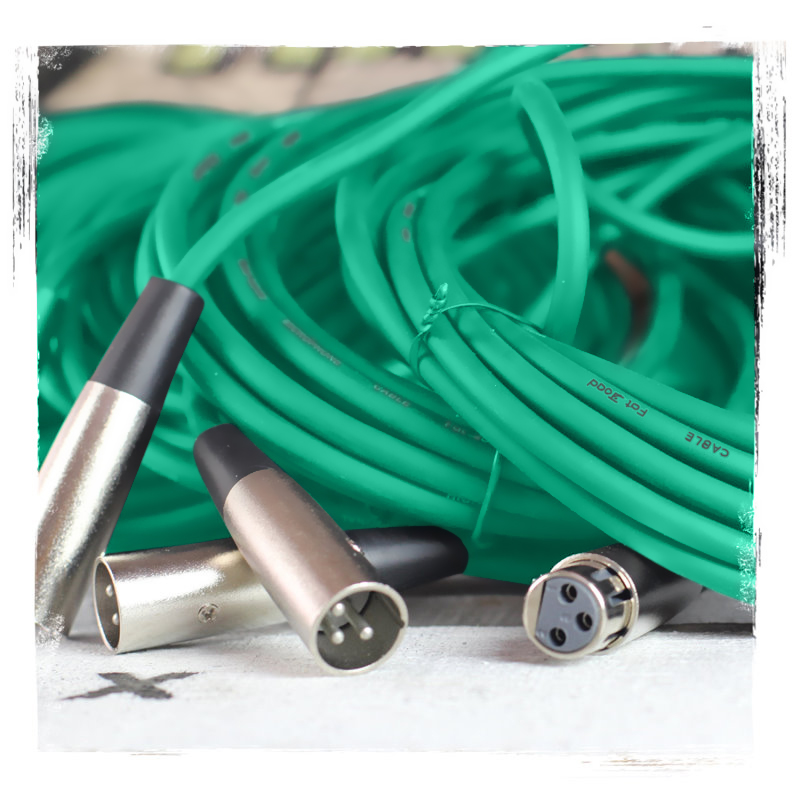
Connectors in their own right are the ends of the cable that link it to audio devices: as for popular types, there are SpeakON connectors, banana plugs, and 1/4-inch jacks.
Why Quality Matters?
Quality cables are not something that is overemphasized in audio systems. Cables made from quality materials with heavy-duty construction methods not only enhance the quality of the sound produced but also significantly contribute to reducing the chances of damage during long-term use.
Here is a customer review from our client Preston Raynor about the PA speaker cables
Best Cables EVER
I love the cables and I love the way this business works. The owner puts his name on his reciepts, great personalized touch. These cables are awesome. I used them right away at rehursals.
Choosing the Right Cable Gauge
Cable thickness is another significant parameter. Measured in American Wire Gauge, or AWG, cables with smaller numbers indicate that the cable is thicker and best suited for high-power installations. A 16-gauge or 18-gauge cable would be all right for a short-distance, low-power setup, but any long-distance or high-power system should have a bigger 12-gauge or 14-gauge so that power does not fade away or overheat, respectively.
Common Causes of PA Speaker Cable Damage
PA speaker cables are very durable but not invincible. Their performance deteriorates over time due to use, environmental factors, or improper handling. It's therefore essential to know some of the common causes that may lead to damage for preventive measures and longer lifetimes for your cables.
Physical Wear and Tear
Frequent use constantly bends, twists, and coils the PA speaker cables, which eventually weakens their internal wires and causes some breakages or intermittent connection. Sharp bends and kinks are especially damaging because they put too much strain on the cable core.
Connector Issues
The connectors at either end of the PA speaker cable tend to be the first place to go. Constant hooking and unhooking, especially without proper realignment, can wear contacts or loosen connections. SpeakON connectors, 1/4-inch jacks, and banana plugs each have fragile parts that call for special care in preventing damage.
Lousy Storage
Improper storage is a major culprit in cable damage. Frayed or highly coiled wires can easily suffer permanent bending, weakening the internal fiber. Dangling cables and heavy items or sharp edges of tools can puncture the insulating material and crush the inner strands. Proper coiling and tying with cable ties can limit this type of damage.
Environmental Factors
Environmental exposure is another frequent offender. Moisture from rain, humidity, or spilled liquids can penetrate the cable and cause corrosion. High temperatures can melt the insulation, while low temperatures make it brittle. Outdoor gigs or poorly ventilated storage areas often exacerbate these problems.
Overloading and Electrical Stress
Using a cable of insufficient gauge for high-power setups will cause overheating, which will damage the wire core. Similarly, high voltage spikes or improper settings of the amplifier may lead to an overload of the cable, causing the melting of insulation or breaking off of strands. Always be sure that your cable can handle the power output from your audio system.
Identifying a Broken or Faulty Speaker Cable
Detecting a problem in a PA speaker cable is important for maintaining sound quality and preventing system failure. Identifying whether a cable is broken or faulty requires attention to several signs, tools, and diagnostic techniques.
Audible Distortion or Sound Loss
The most telling sign of a bad speaker cable is the poor quality of sound. It may crackle, play intermittently, or not produce any sound. These signs are usually linked to internal wire damage or loose connections and compromised insulation.
Visual Inspection
A lot of cable problems are visible to the naked eye. Check for the following:
Loose or frayed wires
When the internal cables are exposed or frayed, it might lead to short-circuiting or signal loss.
Damaged Insulation
Cracks, cuts, or wear on the outer jacket leave the cable open to environmental damage and signal interference.
Faulty Connectors
Bent or loose connector pins may cause the connection between the cable and audio equipment to fail.
Carefully inspect both ends of the cable since they are more prone to wear and tear because of frequent handling.
Test with Other Cables
Replace the suspect cable with a known good one. If the audio problem is now resolved, the fault is probably in the original cable. This is a simple test that can be used to isolate faults in cables.
Multimeter Testing
For a more technical diagnosis, use a multimeter to check the continuity and resistance of the cable.
Continuity Test
Set the multimeter to continuity mode and check if the electrical signal passes through the cable. A lack of continuity indicates a break in the wire.
Resistance Test
Excessive resistance may signal degraded wire quality or poor connections.
Wiggle Test
Gently bend or move the cable along its length while connected to your audio system. If you hear sound interference, the cable may have internal breaks or damaged cores. Pay particular attention to areas near the connectors since they are more prone to wear.
Factors to Consider Before Trying DIY Repair
The DIY repair of a broken PA speaker cable can be an economical and satisfying solution, but it requires some careful consideration. Without key factors evaluated, a person may rush into the repair without considering the outcome, further damaging the product or compromising safety. Here's what to consider before trying a DIY repair:
The Extent of Damage
First of all, assess the damage to determine the severity. Most minor problems like a loose connector or small cut in the insulation can be corrected with simple tools. Severe damage, however, is when there are multiple internal breaks or serious corrosion; it might require professional assistance or complete replacement of the cable.
Type and Quality of the Cable
Not all cables can be easily repaired. Some expensive, high-end cables contain more complex shielding or specific connectors that require more sophisticated techniques or proprietary tools to work on. In this regard, one must weigh whether the cost and effort put into the repair are justifiable against the value of the cable.
Access to Tools and Materials
A successful DIY repair will also depend on specific tools, including wire strippers, soldering irons, heat shrink tubing, and multimeters. Before you start, make sure that you have the proper tools for the job. Anything less will only end in a bad repair.
Technical Skills and Experience
Cables would be fixed by soldering, splicing wires, and reattaching connectors. Without proper knowledge of the procedures, you may inadvertently worsen the damage. First-timers can try practicing the techniques on non-essential cables before attempting on important ones.
Time Investment
DIY repairs are quite time-consuming, especially if you haven't done this before. Add to this preparation and execution time as well as testing time. In extreme cases, it would be most practical to replace the cable or seek professional help when urgent repairs are necessary.
The Best Tools for Cable Repairs
When one has to repair a PA speaker cable, the tools necessary are crucial to be done once and for all. Getting all of these right will not only simplify the process but also bring about quality in the fixing. Here is a very detailed list of some essential tools that every DIYer should consider:
Wire Strippers
Wire strippers remove the insulation from the cable, leaving the internal wires unharmed. Look for an adjustable stripper to handle various gauges of wire.
Soldering Iron and Solder
A soldering iron is an absolute necessity to create strong connections between wires and connectors. Pair it with good-quality solder to ensure good conductivity and durability. Choose a soldering iron with variable temperature control to meet varied repair needs.
Multimeter
It diagnoses the problem, hence checking continuity, showing resistance values, and where there may be internal breaks in a cable for the repair, which ensures that the action taken would not go to waste.
Heat Shrink Tubing
Heat-shrink tubing insulates as well as secures this repaired area of the cable. Plus, it does add some protection against damage from subsequent wear and tear. The tubing should also fit closely over the part of the cable that will be repaired.
Step-by-Step Guide to Repairing a Broken PA Speaker Cable

Repair a PA speaker cable and enjoy its functioning again without needing to incur the cost of replacement. The following is a detailed procedure to help tackle common issues with cables in an effective manner.
Step 1: Inspect and Prepare the Cable
Check the cable for damage before commencing the repair. Ensure to find the exact location of the fault. Identify if the wire is damaged in any place if cut, or if any connectors are loose. Use the audio system to connect it to your audio equipment to check the fault location. Internal breaks and electrical faults can be found using a multimeter by checking continuity.
Once you’ve identified the problem, unplug the cable and prepare your workspace. Gather your tools, including wire strippers, a soldering iron, replacement connectors, heat shrink tubing, and a multimeter.
Cut off any damaged or excessively worn sections of the cable using a utility knife or wire cutters. Be sure to leave enough length to work with while ensuring you remove all compromised areas.
Step 2: Repairing the Cable Core
Once the damaged section is removed, focus on the core wires. Use a wire stripper to carefully strip away the outer insulation, exposing the internal wires. For speaker cables, you’ll typically find two or more wires, each with its own insulation.
Inspect the internal wires for damage. If the wires are broken, trim the ends to ensure clean, even cuts. Twist the exposed wire strands tightly to prepare them for soldering.
If the break is mid-cable, you’ll need to splice the wires together. Align the exposed ends of each wire and twist them securely. For added strength and conductivity, apply solder to the connection. Heat the soldering iron and allow the solder to flow into the twisted wires. Avoid overheating, as this can damage the surrounding insulation.
Step 3: Replacing or Fixing the Connector
A very common cause of cable issues is a failed connector. Remove the used connector by unscrewing or cutting it off of the wire. If possible, check the condition and clean the corrosion off that used connector with contact cleaner.
How to attach a connector:
- Remove a little portion of insulation from each one.
- Put the wires to the appropriate terminals of that connector in the proper positive-negative orientation.
- Secure the wires by soldering them to the connector terminals. If soldering is not necessary, the screws or clamps holding the wires in place need to be tightened.
Step 4: Testing the Cable After Repair
Testing is the last step to ensure that the repair is successful. Continuity across the entire length of the cable should be checked using a multimeter. The meter should indicate a consistent reading, showing no breaks or resistance issues.
Connect the cable to your PA system and test it in a real-world scenario. Pay attention to clear, uninterrupted audio; crackling, distortion, or loss of sound indicates an incomplete repair.
Do a wiggle test by gently moving the cable at different points, especially around connectors and the repaired area. Any interruption in sound indicates a need for further adjustments or reinforcements.
Step 5: Insulate and Secure the Repair
Once you have ascertained that the cable is working, insulate and secure the repaired parts to make them last long and safe. Begin by sliding heat shrink tubing over the repaired area before reassembling the cable. If you did not do this earlier, you can use electrical tape as a substitute.
Heat shrink tubing provides superior insulation and a professional finish. Use a heat gun to shrink the tubing tightly over the repaired area. For added security, wrap the repaired section with electrical tape, ensuring complete coverage and protection from moisture or wear.
Here’s a summarized table for the PA speaker cable repair process !
|
Step |
Action | Key Details |
| 1. Inspect and Prepare Cable | Identify the damage and prepare the workspace. | Use a multimeter to locate internal breaks. Gather tools: wire strippers, soldering iron, heat shrink tubing, etc. |
| 2. Repair Cable Core | Strip insulation and repair the internal wires. | Twist wire strands, then solder connections for strength. Avoid overheating the insulation. |
| 3. Replace/Fix Connector | Replace or clean the damaged connector. | Attach wires to the correct terminals and secure with soldering or screws/clamps. |
| 4. Test the Cable | Check continuity and test with the PA system. | Use a multimeter for continuity. Ensure clear sound during the real-world test and perform a wiggle test. |
| 5. Insulate and Secure Repair | Insulate the repaired area with heat shrink tubing or electrical tape. | Use heat shrink tubing for a professional finish. Secure with electrical tape for added protection. |
Here is a detailed youtube video about tips on repairing your damaged speaker cable !
How to Avoid Future Cable Damage
Saving money from damage to PA speaker cables is just one of the benefits; avoiding damage also means that performances will be consistent during the event or practice sessions. Here are some practical tips to extend the life of your cables:
Proper Handling
Don't pull wires apart. Leave the connector housing for plugging or unplugging an instrument, but not the cable itself, when setting up or taking it down. This will eventually damage internal wires and solder joints.
Hire Tools for Cable Maintenance
Get those ties, reels, or organizers that keep your cables strain-free from tangling and knotting. This allows proper storage which will generally keep them neat, preventing unnecessary strain when traveling. Use wraps of technologies like velcro or rubber straps to secure them.
Avoid Sharp Bends and Kinks
Bends that are too sharp and tight will cut internal wires and, thus, damage signal quality. Cables should always be coiled in a natural loop. Using the over-under coiling method, will prevent twists from occurring.
Protect from Physical Damage
Create walkways that are topped or matted along the places where live performances or outside events will keep heavy steps and run-over equipment with cables. This would keep cables out of foot traffic.
When to Replace Your PA Speaker Cable
With proper care and maintenance, there is always a time to replace a PA speaker cable. Here are signs and considerations that tell you it's time for a new cable:
Persistent Sound Issues
When you notice crackling, distortion, or audio dropouts, there is a possibility of internal damage, and no solution might be possible. Such conditions will affect the quality of your sound in performances and recordings.
Severe Physical Damage
Cables that have serious cuts, bare wires, or broken insulations present hazards and are not likely to function correctly. Though minor damage can be easily repaired, severe wear can mean replacement.
Too Much Repairs
When you repeatedly repair the same cable, it is more prudent to change it altogether. Frequent repairs may cause weakening of the cable and shorten its life.
Does Not Work with New Devices
Sometimes, cables for upgrading your audio system might be required with a different connector or specification. For instance, older cables do not have support for new connectors like SpeakON or balanced XLR.
Outdated or Substandard Quality
Poor quality or cable that does not conform to current industry standards is also an excellent reason to upgrade to a more durable and reliable option to improve performance.
Here is a customer review from our client Samara Rohan who replaced their old PA speaker cables
Works great.
I purchase speaker cable cause having problems my old cables. I replaced it and everything solved. Great price and product.
Why Choose GeekStands for PA Speaker Cables
At GeekStands, we understand that clear, reliable sound is the foundation of any great performance. That’s why our PA speaker cables are designed with high-quality materials and expert craftsmanship to deliver superior audio quality and long-lasting durability. Engineered to minimize signal loss and interference, our cables ensure that your sound stays pristine, whether you’re in the studio or on stage.
Our range of PA speaker cables is built to meet the needs of every sound engineer and musician, offering exceptional flexibility, strength, and performance. With robust connectors, thick insulation, and durable construction, GeekStands speaker cables provide the reliability you need to keep your audio equipment working flawlessly.
Built to withstand the rigors of both live shows and extensive rehearsals, our PA speaker cables offer consistent, noise-free performance every time. Trust GeekStands to elevate your sound setup with cables that combine outstanding durability, crystal-clear transmission, and ultimate dependability—upgrade your audio gear today and experience the difference!
Share:
 Michael Jelliff